


The wonders of modern medicine can’t be understated, but sometimes going back to basics can be a positive, helpful, and cathartic experience. For me, I have always wanted to have one of those aesthetic and natural medicine cabinets all over Pinterest. You know the ones with vintage cabinets full of dried herbs, medicinal tea, adaptogens, and amber bottles? That was always my dream. Beyond the beauty and aesthetic of a nice Pin, I’ll teach you how to start a home apothecary
Decorating your home with a clinical dispensary or herbal apothecary not only gives it a refined, retro look, but it also gives you endless possibilities for herbal remedies that can arguably be more beneficial than a pill or a syrup. Herbal medicine is coming back on the scene in a big way lately, especially on social media, but you cannot underestimate the medicinal properties that mother nature has given us.
I am often reminded of the idea that Barbara O’Neil planted in one of her many seminar videos online. The same God that commanded the heavens to endlessly expand also commanded the plants to produce for his other creations – you and I. The more we understand what God has placed on earth for our health and wellness, the more we understand the extent of his love and forethought for us.
Before we dive in, Nigermany is a participant in the Amazon Services LLC Associate program and occasionally utilizes some affiliate links which may generate a small commission from the clicks that result in a purchase.
So, how should you start your own herbal apothecary?
What is an Apothecary?
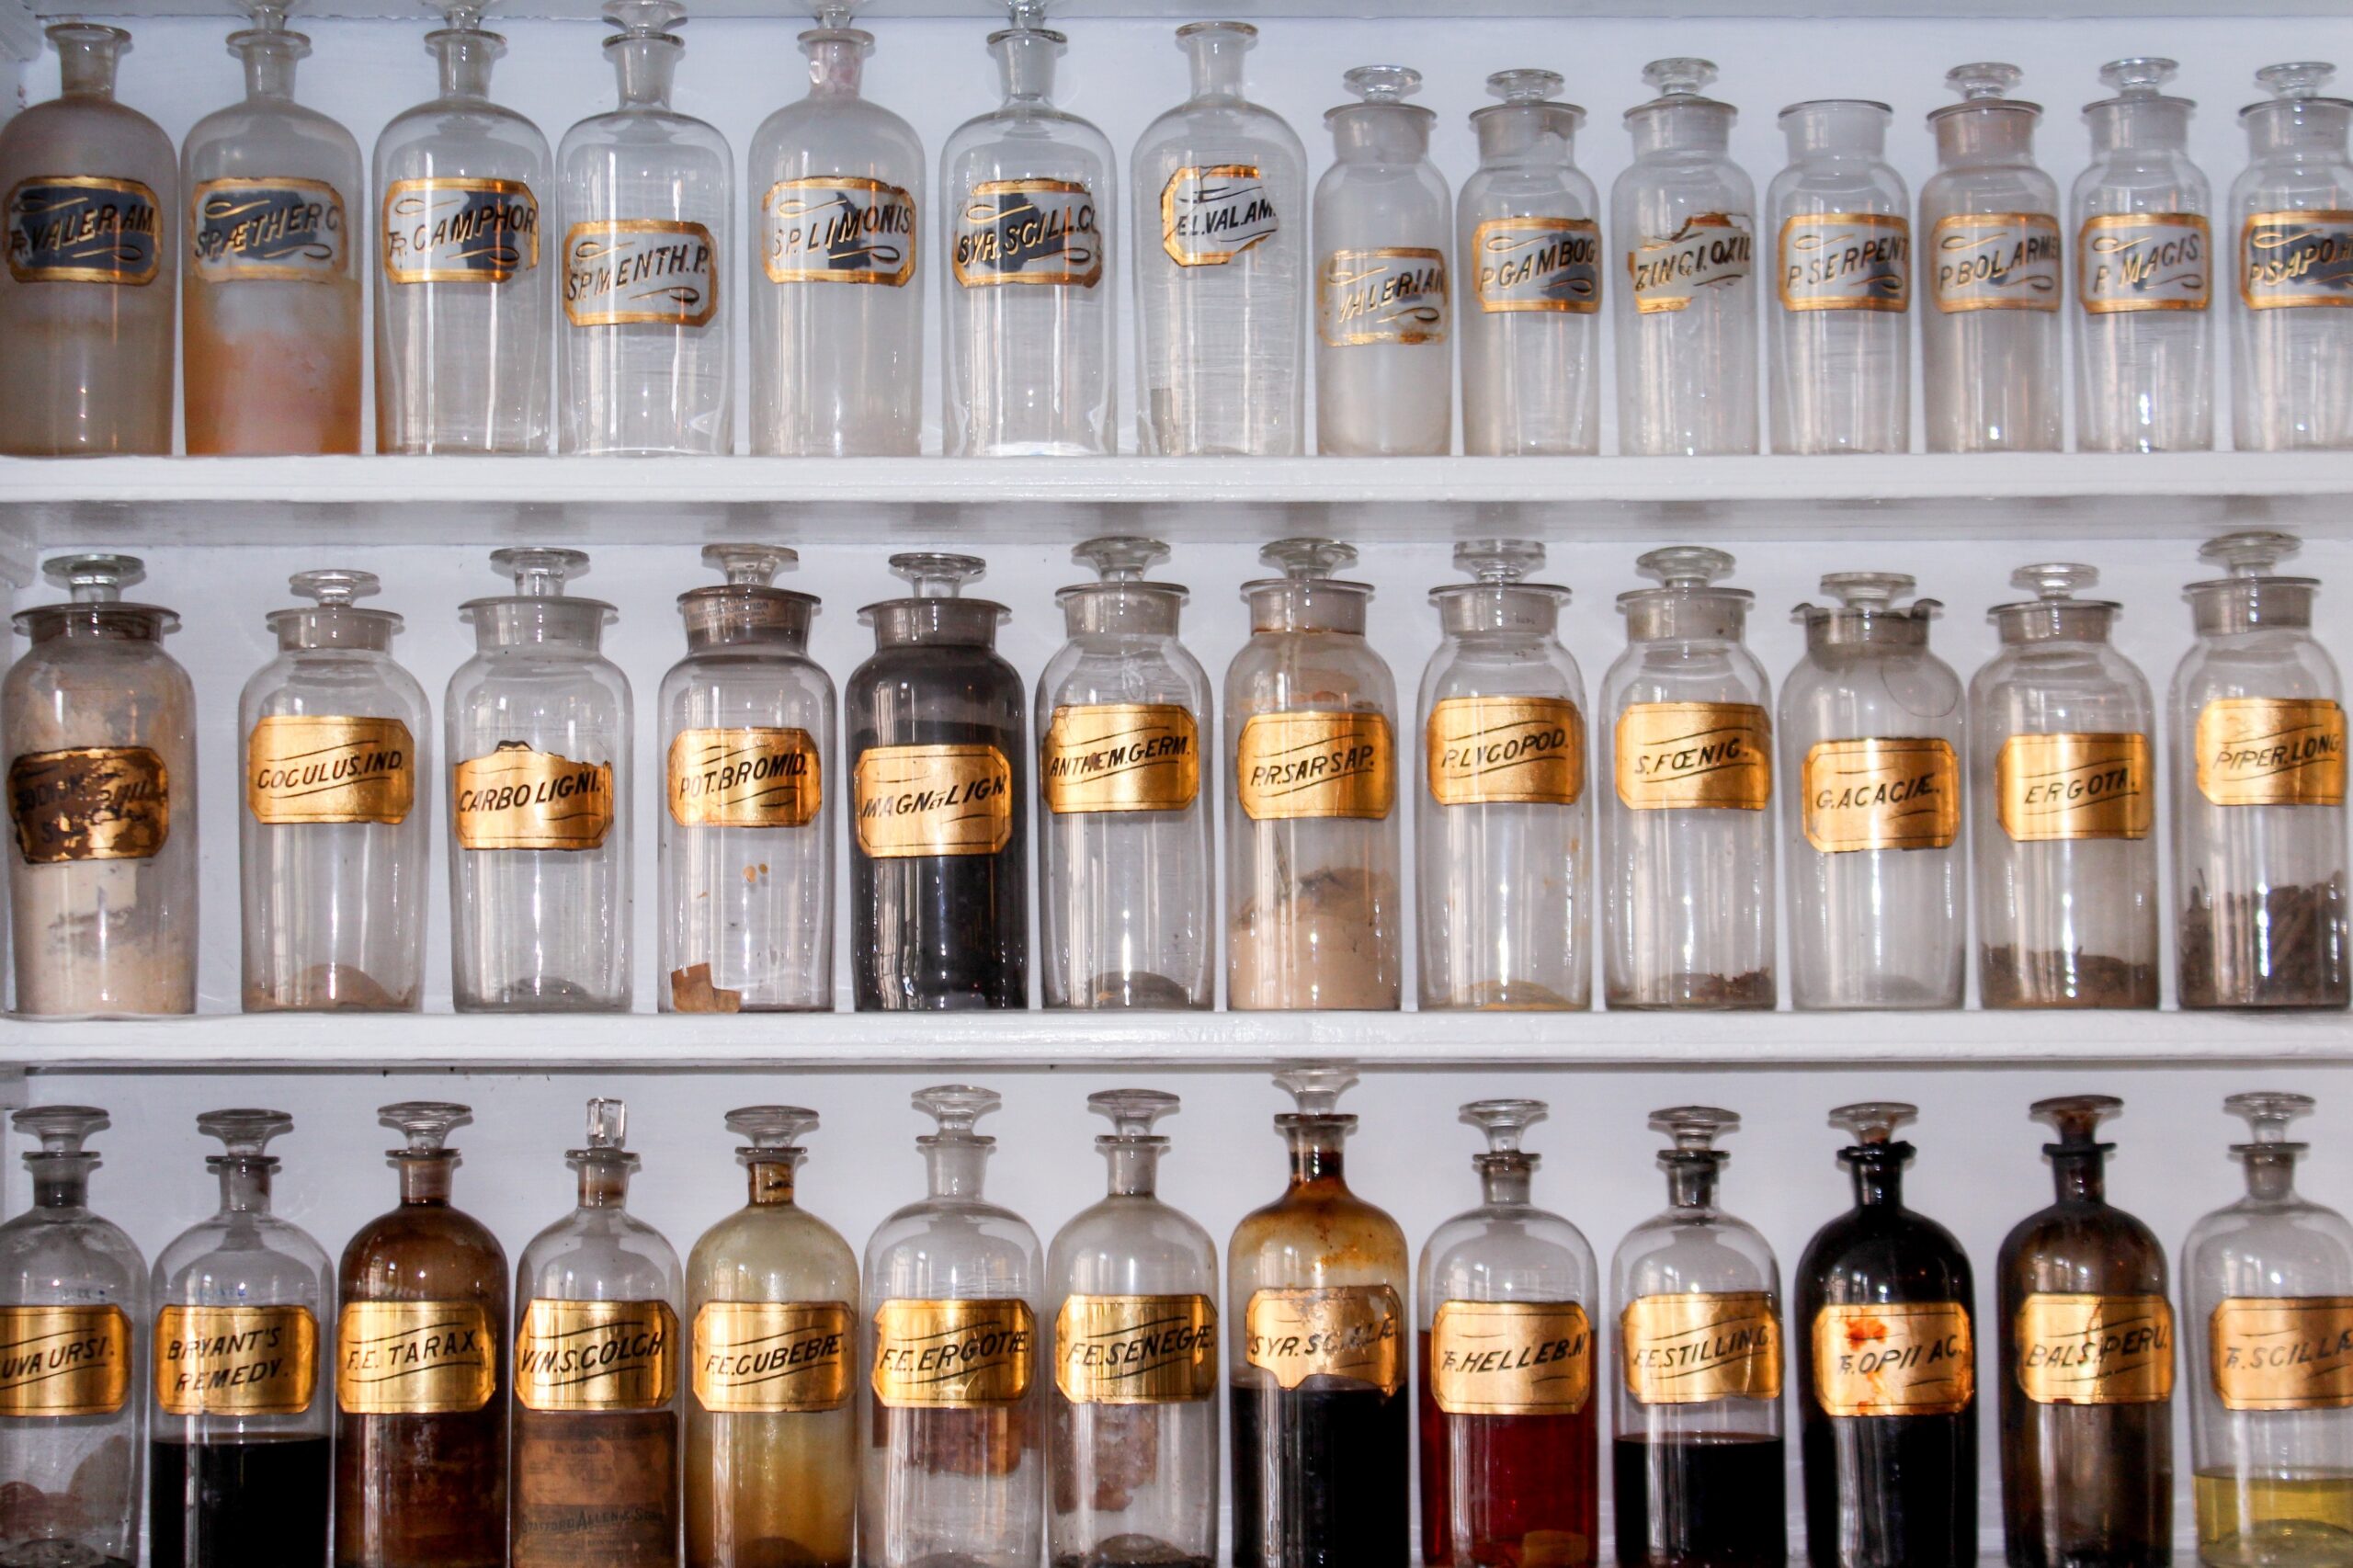
An apothecary is defined as a person or place who prepares and sells medicines. Before advanced chemistry and pharmacology, humans figured out a way to mix dried herbs and oils to make magical cures for common ailments. This was the start of herbalism, which is basically how people managed not to die during primitive societies, using something as simple as a herbal tea, tincture, or salve. Apothecaries are dated all the way back to 2600 BC in Babylon, with clay texts and tablets describing recipes and symptoms. Apothecaries continued throughout history in ancient Egypt, Rome, China, Baghdad, India, and many other places.
Related Articles You’ll Love
How Do I Set Up a Home Herbal Apothecary?
Setting up your own apothecary at home is a long-term commitment to a project, but it starts very simply. Eventually, you will have the Harry Potter cabinet of herbs, infused oils, salves, balms, herbal products, and all the mason jars you can dream of, but it all starts with simple blends and a few glass jars. Here’s what you need to do:
1-Find The Right Tools
While it’s easy to get overwhelmed with buying a ton of containers and measuring tools for all your chamomile and elderberry needs, it’s best to start with the simple essentials. First of all, a mortar and pestle (here’s another favorite) is a must to make herbal blends. You use the mortar and pestle to grind up your herbs to mix with others, or as a base to use for salves and balms. You can even make use out of it for cooking.
Secondly, you need to get the proper storage tools. Mason jars are your best friends, and they are the most common method of storage for everything herb related. Before adding anything to your jar, however, you need to properly strain it. This is where the cheesecloth and strainer come in to strain any gunk from herbal infusions, tinctures, and balms. If you’re going to dry your own herbs instead of buying pre-dried ones, then you will also need a good drying rack. A cloth would work, but for intense drying processes, you need the best option available.
With the preparation tools for your botanical needs done, you can then move up to more complex tools like a double broiler and measuring tools. These are critical for making tinctures and properly measuring everything. Herbalism requires extreme accuracy, and the measuring tools will help you achieve that.
2-Do your Herbal Preparations
Because Herbalism is such a complex science, it’s very difficult to know what goes with what and what does what from the very beginning, but baby steps are the key. Starting off with a few dried herbs, infused oils, and a tincture or two will put you on that path, but you first need to know their function.
Here are some common herbs – all of which can be purchased at Mountain Rose Herbs:
- Chamomile: Chamomile can be used to prevent or relieve inflammation, ulcers, muscle spasms, and menstrual disorders. It can also help with sleep. Chamomile can be blended with lavender for superior relaxation effects or with peppermint for the digestive system.
- Elderberry: Elderberries are one of the oldest medicinal herbs ever used in home herbalism. They are rich in antioxidants and ideal for immune support. For a more powerful immune boost using herbal actions, you can make your own herbal blend by combining elderberry with echinacea, astragalus, or with ginger for anti-inflammatory purposes.
- Ashwagandha: Ashwagandha has been making the rounds lately with herbal companies labeling it the next best adaptogenic herb for medicinal use, but they might be right. Ashwagandha is used for stress relief and lowering blood sugar. For more effective stress relief, ashwagandha can be mixed with holy basil, Rhodiola, or licorice root.
- Turmeric: In many eastern societies, turmeric is known for its almost magical properties. With its bioactive compounds, turmeric is the ultimate anti-inflammatory herb. It’s also used as an antioxidant and to reduce swelling. For mixtures, it’s often used with ginger, black pepper, cinnamon, cardamom, and cloves. It can even be mixed with green tea.
Herbs not the only weapon in an herbalist’s arsenal, because infused oils are also being made more frequently nowadays. An infused oil is made by mixing an herb or flower with a carrier oil. Here are the most common ones:
- Calendula-infused oils: Calendula oils are often used for irritations, minor burns, dry skin, and mild inflammation.
- Lavender-infused oil: Just like the herb, lavender oil is mainly used for relaxation and soothing. Some even place a few dots on their pillow before bed so that they can go to sleep easier.
- Arnica-infused oils: Arnica-infused oils share the anti-inflammatory properties of other herbs, while also relieving muscle soreness, swelling, minor injuries, and bruises.
- Rosemary-infused oil: Unlike lavender, rosemary oil is meant to wake you up, not put you to sleep. It has stimulating properties and it can promote hair growth.
Other than herbs or oils, tinctures can also be made by placing herbs in alcohol or vinegar. Salves and balms are usually used for skin healing, but they follow a similar process of crushing the herbs before adding them.
3-Source Your Dried Herbs to Start
Like any ingredient, sourcing what you need for herbalism is critical. The most guaranteed method is planting your own herbs, but while it adds an extra hobby of planting and gardening, it takes time. You can plant a couple of really simple and quick-growing ingredients like basil or mint. Some herbs have a night and day difference between fresh and store-bought, like lemon balm, since it loses its aromatic properties during intense production. You might have to source your other herbs elsewhere. This is where herb companies and suppliers come in. It’s best to choose organic suppliers with proper certification. This will require some research and review reading, but it’s worth it.
How To Store Your Apothecary Herbs at Home
Apothecary storage might be even more critical than sourcing the plants themselves. This is because plants are so radically different. For example, some herbs and oils like almonds, peppermint, and anything with citrus are photosensitive, meaning they can’t be in direct sunlight for long. Herbs also don’t last forever, contrary to popular belief.
For one, you need to invest in some high-quality dark containers. These amber eye droppers and jars are a favorite. An average bottle or glass container might work with some, but not for all. Again, if an herb or mixture is photosensitive, then it can’t be exposed to direct sunlight. Next, you want to make sure everything is kept dry and airtight. A dry herb should be, well, dry! Your containers should be sealed tightly without a drop of water getting in. For that, you can use moisture packets like silica gel if you prefer.
Thirdly, you’ll need to do some interior design to figure out where to put the apothecary. Your mixtures and herbs need to be in a cool, dry area; not too cold, and not too hot. So, if your kitchen gets direct, warm sunlight, you might have to look elsewhere. We recommend a dungeon to cap off the whole medieval herbalist style, but not all homes come with dungeons these days.
Lastly, labels! If you’re a beginner, it will be very hard to distinguish what from what. I recommend this label maker with tape which I’ve had for a couple of years and it’s efficient, fast, and reliable. You don’t want to be stuck looking at four jars of dark green herbs and spend 5 minutes smelling each one trying to remember what marjoram or nettle smelled like.
Takeaway
Overall, starting your herbalist journey is simple and exciting, if you have the right tools and knowledge. You will quickly find yourself being a magician when someone in the household has a cold or stomachache and you whip up a healing concoction in true Arthurian fashion. Start with a few ingredients and a couple of mixtures and you’ll be shocked at how immersive this natural world is.

Interested in learning to build more options out of the system? Click here. Or join my newsletter where I share tips each week.
Thanks for reading!
Leave a Reply


Food independence
How We Built A Years Worth of Food Security
Popular Posts

Self Sufficiency
My 2020 Wake Up Call That Changed My Life

self sufficiency
What Self Reliance Really Means

Food preservation
The #1 Skill That Saves Us $300/month


New around here? Start with these resources
the FREEBIES

How To Detox Your Home Naturally
download
Self Sufficiency Checklist
download
The World Full of Natural Remedies
download
A daily 90-second lesson delivered straight to your inbox, with the exact steps I took to eliminate my dependencies - house, electricity, water, food - and get out in just 5 years (without leaving the suburbs, without acres of land).
Fast track your exit path from 30 -> to 5 years
free email course

Join over 1K+ Individuals & families

Thank you for writing this, I found it very helpful to build my home apothecary. Valuable information.
XX
Exciting to hear! It’s great knowing so many are working on their apothecaries all over the world!