I'm a former tech executive who traded a corporate paycheck for a paid off house, homeschooled kids, and a family that hasn't needed the grocery store the same way in years - all from a suburban ranch home with no farm (yet).
Hi! I'm Janiece
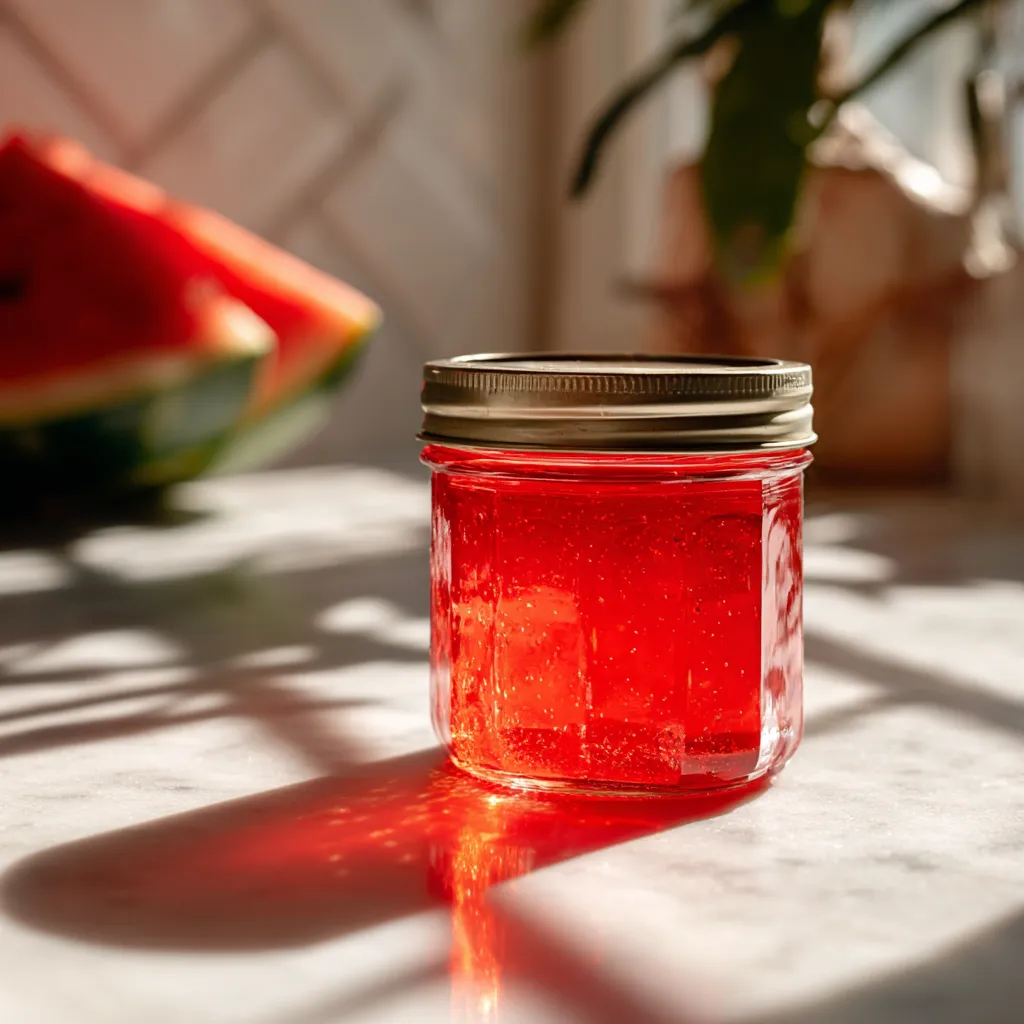
What do you do when you have more watermelon than your family can possibly eat? You transform it into liquid gold! Watermelon jelly is one of those hidden gems in the preserving world that most people have never tried making. It’s vibrant, naturally sweet, and captures the essence of summer in every spoonful. Whether you’re wondering how to start canning or looking to expand your preserve collection with something truly special, this stunning jelly will blow your mind. The best part? It’s surprisingly simple and uses fruit that might otherwise go to waste.
Why Watermelon Jelly Is Perfect for Beginners
Learning how to make watermelon jelly is ideal for new canners. The process is straightforward and forgiving. You don’t need fancy equipment or complicated techniques. Plus, watermelon is naturally high in water content, which makes it perfect for extracting juice. The beautiful color alone will make you feel like a preserving pro!
Best Watermelons for Perfect Jelly
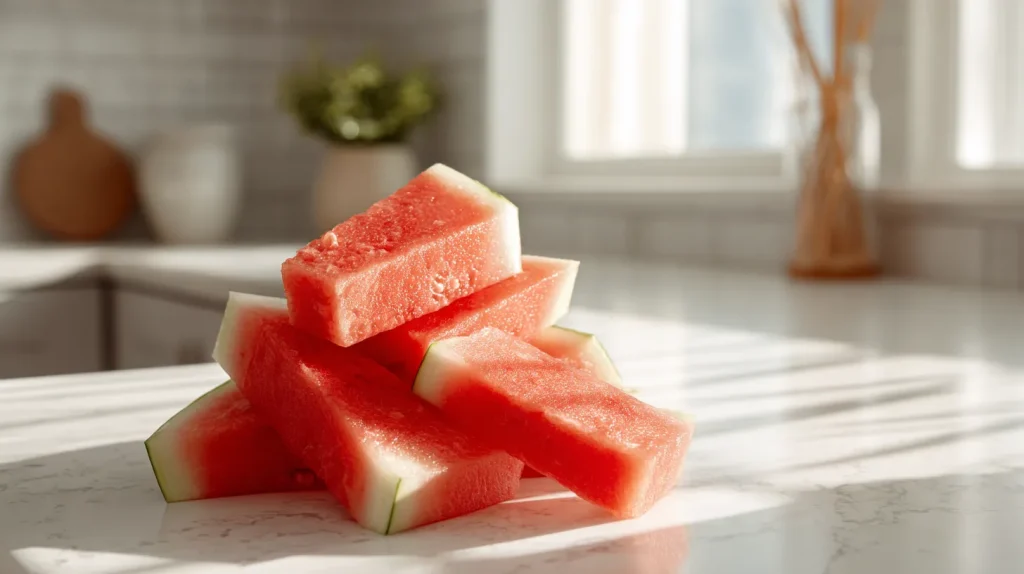
Not all watermelons are created equal when it comes to jelly making. Choose fully ripe, sweet watermelons for the best flavor. Look for melons that sound hollow when tapped and have a creamy yellow spot where they sat on the ground. Red-fleshed varieties work beautifully, but don’t overlook yellow watermelons for a unique golden jelly that’s absolutely gorgeous.
Essential Equipment for Watermelon Jelly
You’ll need some basic equipment to create this summer treasure. A large pot for cooking, fine-mesh strainer or jelly bag for extracting juice, canning jars with new lids, and a water bath canner are your essentials. A candy thermometer helps ensure perfect consistency. Most of these items are one-time investments that will serve you for years of preserving adventures.
Step-by-Step Watermelon Jelly Process
Start by cutting your watermelon into chunks, removing seeds as you go. Place the fruit in a large pot with just enough water to prevent sticking. Cook over medium heat until the watermelon completely breaks down and releases its juice. This usually takes about 20 minutes of gentle simmering.
Next, strain the mixture through a fine-mesh strainer or jelly bag. Don’t press the pulp if you want crystal-clear jelly. Let gravity do the work overnight for the clearest results. You should end up with beautiful, clear watermelon juice that smells like summer heaven.
Watermelon Jelly Recipe
Learn how to make watermelon jelly with this simple step-by-step guide.
4lbsripe watermelon, seeded and cubed (yields approximately 4 cups juice)
3cupsgranulated sugar
1/4cupbottled lemon juice (do not substitute fresh)
1pkg(1.75 oz) powdered pectin
1/2cupwater
Equipment
Large heavy-bottomed pot for cooking watermelon
Fine-mesh strainer or jelly bag for juice extraction
Boiling water bath canner or large stockpot with rack
6 half-pint (8 oz) canning jars with new lids and rings
Jar lifter, bubble removal tool, and headspace gauge
Ladle and wide-mouth funnel
Method
Prepare Jars: Examine all jars for cracks or chips and discard any damaged jars. Wash jars and rings in hot soapy water, rinse thoroughly, and keep jars hot in a 180°F oven or hot water until ready to fill.
Heat Lids: Place new canning lids in a small saucepan, cover with hot water at 180°F, and keep hot until ready to use. Do not boil lids as this may damage the sealing compound.
Prepare Canner: Fill your boiling water bath canner with enough water to cover jars by 1-2 inches when submerged. Begin heating water to a rolling boil while preparing jelly.
Extract Watermelon Juice: Place cubed watermelon and 1/2 cup water in a large pot and cook over medium heat for 15-20 minutes, crushing fruit with a potato masher until completely broken down and juicy.
Strain Juice: Pour cooked watermelon through a fine-mesh strainer or jelly bag, pressing gently to extract juice. Measure exactly 4 cups of strained juice, adding water if needed to reach full measurement.
Combine Ingredients: Return measured watermelon juice to pot and stir in powdered pectin until completely dissolved. Add bottled lemon juice and bring mixture to a full rolling boil over high heat, stirring constantly.
Add Sugar: Add all 3 cups of sugar at once to the boiling juice mixture, stirring constantly to dissolve completely. Return to a full rolling boil that cannot be stirred down and boil hard for exactly 1 minute.
Test for Doneness: Remove jelly from heat and quickly skim off any foam with a metal spoon. Test consistency by dropping a small amount on a cold plate – it should wrinkle when pushed with your finger.
Fill Jars: Using a ladle and wide-mouth funnel, fill hot jars with jelly, leaving exactly 1/4 inch headspace. Remove air bubbles by running a plastic tool around the inside of each jar and wipe jar rims clean with a damp paper towel.
Process in Water Bath: Center hot lids on jars and apply rings finger-tight only. Using jar lifter, place filled jars on canner rack and lower into boiling water, ensuring jars are covered by 1-2 inches of water. Process for exactly 10 minutes, adjusting for altitude: add 5 minutes for 1,001-6,000 feet, add 10 minutes for above 6,000 feet. Remove jars and cool undisturbed for 12-24 hours.
Notes
Always use bottled lemon juice to ensure proper acidity levels for safe canning
Do not alter sugar, acid, or fruit ratios as this affects both safety and gel formation
Check that all lids have sealed properly before storing (lids should not flex when pressed)
Store sealed jars in a cool, dark place for up to 2 years for best quality
Refrigerate after opening and use within 3 weeks
If jelly fails to set, it can be used as a delicious syrup for pancakes or ice cream
Natural color fading may occur over time and is normal for watermelon jelly
Achieving Perfect Watermelon Jelly Consistency
Measure your strained juice and combine it with sugar and pectin according to tested ratios. The key is bringing the mixture to a rolling boil that can’t be stirred down. Add your pectin and boil for exactly one minute. Test for doneness using the plate test – a drop of jelly should wrinkle when pushed with your finger on a cold plate.
Canning Your Watermelon Jelly Safely
Pour your hot jelly into sterilized jars, leaving proper headspace. Wipe the rims clean and apply lids and rings finger-tight. Process in a boiling water bath for the recommended time based on your jar size. The satisfying “pop” of sealing lids is music to any canner’s ears!
Creative Uses for Homemade Watermelon Jelly
This versatile jelly isn’t just for toast! Try it as a glaze for grilled chicken or pork. Swirl it into cheesecake batter for a summer dessert. Mix it with cream cheese for an elegant spread. Pair it with sharp cheeses on a charcuterie board. The possibilities are endless and delicious.
Troubleshooting Watermelon Jelly Issues
Sometimes jelly doesn’t set perfectly, and that’s okay! If your jelly is too soft, it makes an incredible syrup for pancakes or ice cream. If it’s too firm, gently warm it before serving. Every batch teaches you something new about the process.
Build Your Food Independence Legacy
Mastering watermelon jelly is more than creating a delicious preserve. You’re building food independence skills that connect you to generations of preservers before us. When you learn how to start canning with projects like this, you’re taking control of your family’s nutrition while reducing waste.
There’s incredible satisfaction in transforming fresh, seasonal produce into shelf-stable treasures. You’re not just making jelly – you’re creating memories and building skills that will serve your family for years to come. So grab that watermelon and let’s start building your amazing, self-sufficient pantry together!
A daily 90-second lesson delivered straight to your inbox, with the exact steps I took to eliminate my dependencies - house, electricity, water, food - and get out in just 5 years (without leaving the suburbs, without acres of land).