

When I first heard about freeze-drying, I thought it was something only astronauts or survivalists needed. But once I realized how easy it is to preserve food this way—and how much better it tastes than traditional dehydrated food—I was hooked. Freeze-drying keeps food fresh for over twenty years, retains nearly all its nutrients, and makes meal prep incredibly convenient.
If you want to store food long-term without worrying about it spoiling or losing its flavor, freeze-drying is one of the best preservation methods. My favorite fact is that it retains over 95% of the nutrients in this unique process which is great news! In this guide, I’ll walk you through exactly how to do it at home, what equipment you need, and which foods are best suited for freeze-drying to maximize shelf life and nutrition.
Why Freeze-Dry Food?
Freeze-drying removes almost all moisture from food, which prevents bacteria, mold, and spoilage while locking in flavor and nutrients. This process is different from traditional dehydrating because it preserves the food’s texture, taste, and nutritional value much better. For anyone serious about food storage, meal prepping, or emergency preparedness, freeze-drying is a game-changer.
Think about it: imagine having a full pantry stocked with fresh-tasting fruit, vegetables, and even entire meals, all preserved without refrigeration. Freeze-dried food is also incredibly lightweight, making it perfect for backpacking, camping, and emergency food kits. It’s no wonder more people are turning to this method.
How Freeze-Drying Works
Freeze-drying is a process that removes moisture in three stages: freezing, sublimation, and desorption. First, the food is frozen at temperatures as low as -40°F, turning all moisture into ice. Then, through a vacuum process, the ice transitions directly into vapor, skipping the liquid phase entirely. Finally, any remaining moisture is removed to ensure the food is completely dry and shelf-stable.
This method is far superior to traditional dehydrating because it removes almost all moisture, whereas dehydrating only removes 70-80%. That leftover moisture in dehydrated food can lead to bacterial growth over time, whereas freeze-dried food remains fresh for decades when stored properly.
Essential Equipment for Freeze-Drying at Home
Freeze-drying at home does require an upfront investment in equipment, but it pays off over time by significantly reducing food waste and providing you with long-term storage options. The most crucial piece of equipment is a home freeze-dryer. Brands like Harvest Right have made it easier for households to own their own machines. I bought a Medium Harvest right freeze dryer for just over $2,000 this year and despite the cost, I couldn’t be more happy!
Along with the freeze-dryer, you’ll also need:
- A vacuum pump to assist with the drying process (often comes with your freeze dryer)
- Pre-freezing trays to help speed up the process (often included)
- Mylar bags and oxygen absorbers for proper long-term storage
- An impulse sealer to ensure airtight sealing of Mylar bags
- Silicone tray liners for easy food removal and cleanup
If you’re not quite ready to invest in a home freeze-dryer, you can attempt a DIY method using a regular freezer. However, this method takes several weeks rather than hours and doesn’t remove as much moisture, meaning the food won’t last nearly as long.
Best Foods to Freeze-Dry
Not all foods are ideal for freeze-drying, but many do exceptionally well. Fruits and vegetables are among the best candidates, as they rehydrate beautifully and maintain their fresh taste and texture.
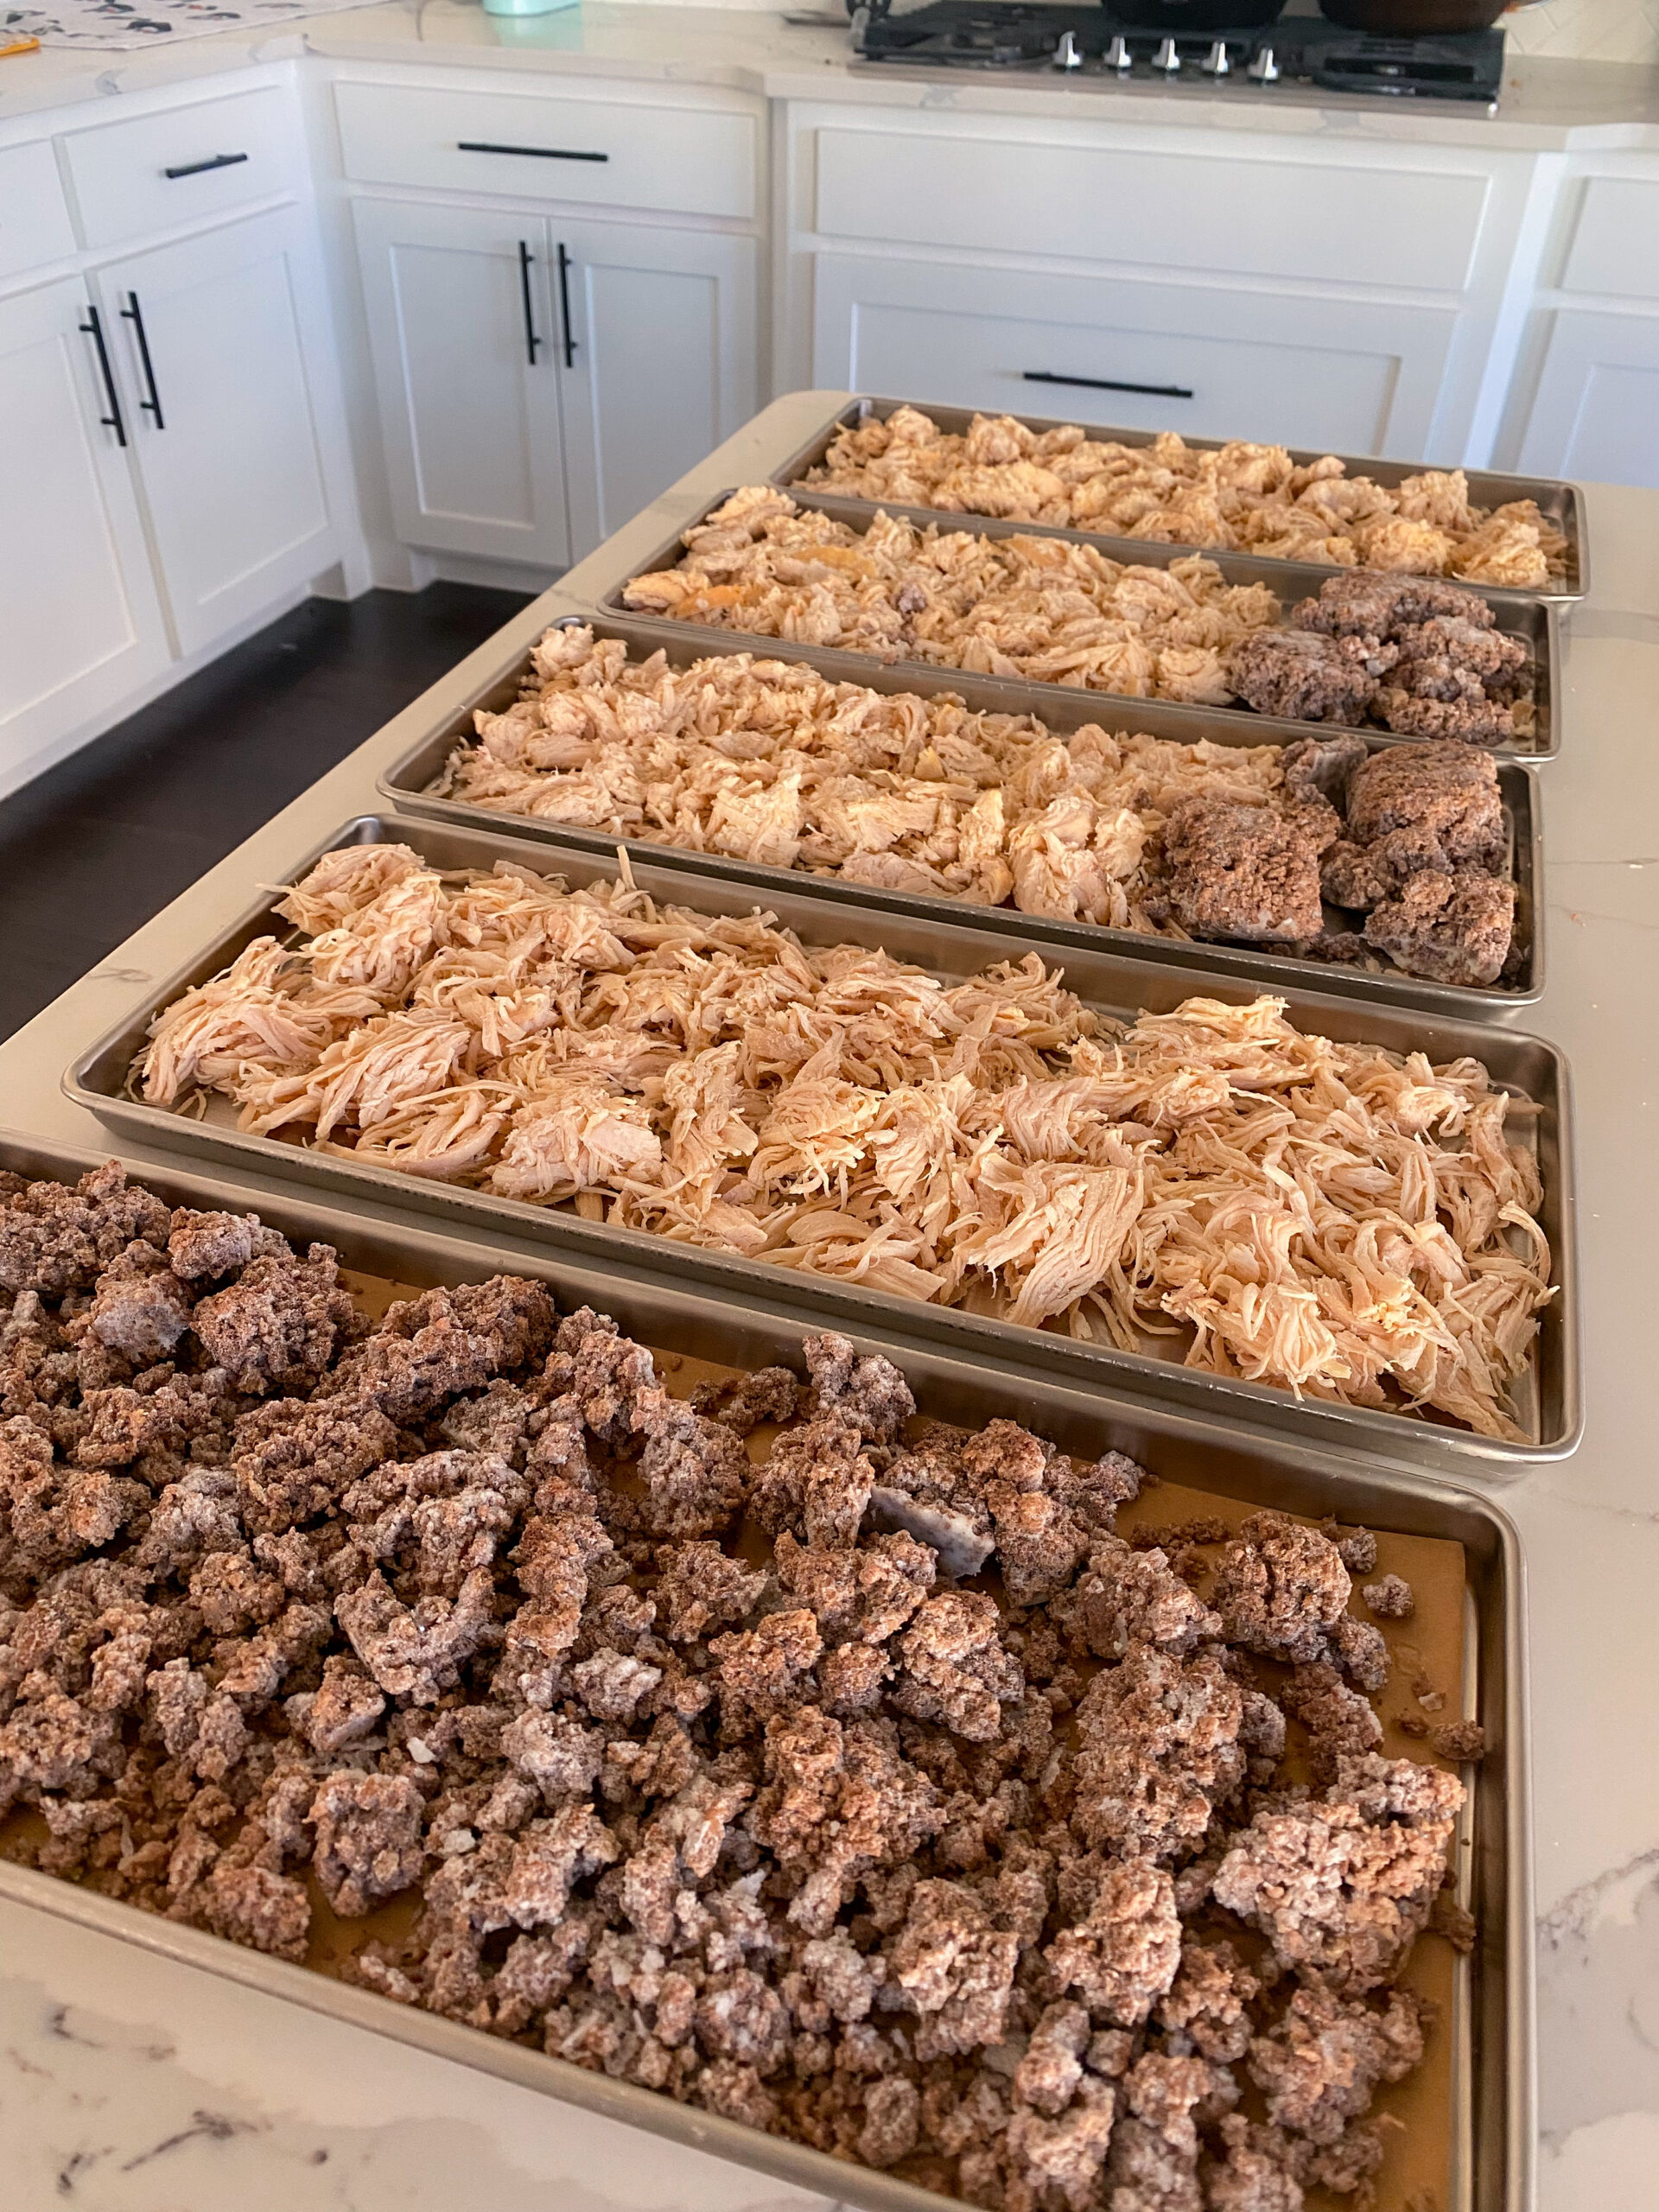
For fruits, berries, apples, bananas, mangoes, and peaches all freeze-dry exceptionally well. Vegetables like peas, corn, carrots, bell peppers, spinach, kale, and broccoli are also great options. You can even freeze-dry cooked meats like chicken, beef, and pork, making meal preparation much easier.
Dairy products like yogurt, cheese, and scrambled eggs also freeze-dry well. Surprisingly, full meals such as soups, pasta dishes, rice and beans, and even chili can be freeze-dried and rehydrated later with a bit of water.
On the other hand, foods with high fat content—like butter, avocado, and fatty meats—don’t freeze-dry well because fat doesn’t freeze properly. Sugary foods like honey and syrup also don’t freeze-dry because they retain moisture. Trust me on this one. You will have a massive explosion of goop in your freeze dryer that is a mighty pain to clean up. Similarly, raw eggs don’t work well in the process, though scrambled eggs do just fine.
Step-by-Step Guide to Freeze-Drying at Home
- Prepare Your Food – Slice fruits and vegetables into thin pieces for even drying. If freeze-drying cooked meals, prepare them as you normally would before placing them in the trays.
- Pre-Freeze (Optional) – Although not required, pre-freezing your food before placing it in the freeze-dryer speeds up the process.
- Load the Freeze-Dryer Trays – Arrange food in a single layer on the trays, ensuring they don’t overlap to allow even drying.
- Start the Freeze-Dryer Cycle – This step can take anywhere from 24 to 48 hours, depending on the food type and moisture content.
- Check for Proper Drying – Once the cycle is complete, break a piece of food in half. If there’s any residual moisture, it needs more drying time.
- Store Properly – Transfer the dried food to Mylar bags, add an oxygen absorber, and seal it with an impulse sealer to maintain freshness for years.
Storing Freeze-Dried Food for Maximum Shelf Life
The key to keeping freeze-dried food fresh for decades is proper storage. Mylar bags with oxygen absorbers are the best option for long-term storage, as they prevent moisture and oxygen from degrading the food. Store sealed bags in a cool, dark place to ensure the longest shelf life.
For shorter-term use, vacuum-sealed jars work well, especially for snacks like freeze-dried fruit or yogurt bites. Always label your stored food with the date to keep track of freshness, and use the oldest items first.
Common Freeze-Drying Mistakes to Avoid
Many beginners make a few common mistakes that can compromise the quality of their freeze-dried food. Overloading the machine, not pre-freezing food, and using improper storage methods can all lead to issues with moisture retention and spoilage. Additionally, skipping the final drying phase can result in food that isn’t fully preserved.
To avoid these problems, follow tested methods and always ensure your food is completely dry before storing it. A simple way to test is to break a piece in half—if it feels cool or damp inside, it needs more drying time.
Is Freeze-Drying Worth It?
If you’re serious about long-term food storage, emergency preparedness, or having lightweight, ready-to-eat meals on hand, freeze-drying is an excellent investment. While the initial cost of a freeze-dryer is significant, the ability to store food for over twenty years with nearly zero waste makes it well worth the expense.
Imagine having a stocked pantry full of fresh-tasting meals, snacks, and homegrown produce, all preserved without refrigeration. That’s the power of freeze-drying. If you’re ready to get started, check out my Food Preservation Collection for all the essential tools you’ll need. Once you start freeze-drying, you’ll wonder how you ever lived without it.

Interested in learning to accelerate your path to freedom? Click here. I'll help you speed up your path to freedom by decades.
Thanks for reading!


Food independence
How We Built A Years Worth of Food Security
Popular Posts

Self Sufficiency
My 2020 Wake Up Call That Changed My Life

self sufficiency
What Self Reliance Really Means

Food preservation
The #1 Skill That Saves Us $300/month
New around here? Start with these freebies
The Digital
FREEBIES
The Ownership Playbook
Cut off 10+ years to early freedom

The Book of Natural Remedies
download

The Canning Quick Start Guide
Can your first batch in 2 hours

