I'm a former tech executive who traded a corporate paycheck for a paid off house, homeschooled kids, and a family that hasn't needed the grocery store the same way in years - all from a suburban ranch home with no farm (yet).
Hi! I'm Janiece
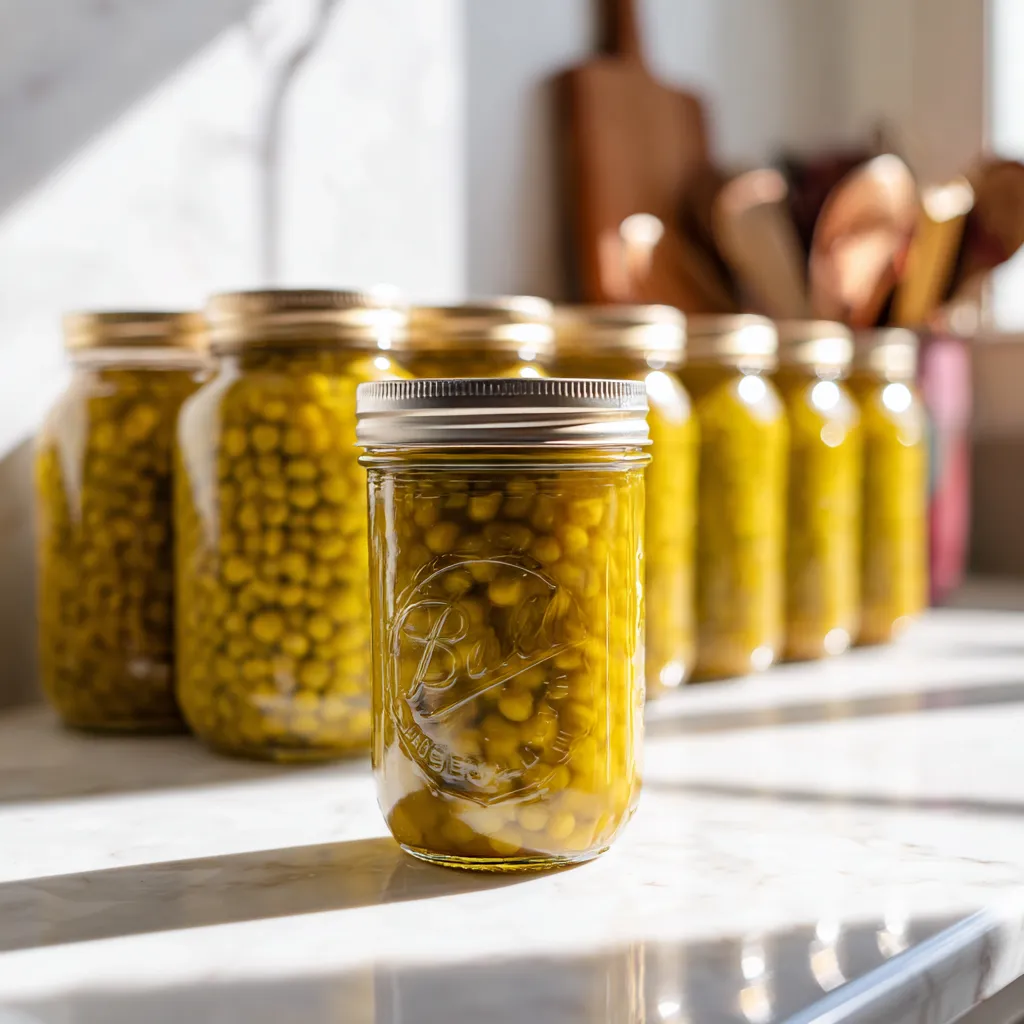
There’s something magical about opening a jar of homemade split pea soup on a cold winter evening. The aroma fills your kitchen instantly, bringing comfort and nourishment to your family table. If you’ve been wondering about canning split pea soup or searching for ways how to start canning hearty, filling meals, you’ve discovered one of the most rewarding preservation projects you can tackle. This isn’t just about creating convenient meals – it’s about mastering a skill that transforms simple ingredients into shelf-stable comfort food that rivals any restaurant version.
Why Canning Split Pea Soup Changes Everything
Let me tell you why canning split pea soup has become one of my absolute favorite preservation projects. Split pea soup is naturally hearty, incredibly nutritious, and freezes beautifully in jars for long-term storage. When you make your own, you control every single ingredient. No artificial preservatives, no excessive sodium, and no mystery additives that you can’t pronounce. Plus, there’s something deeply satisfying about having homemade soup ready at a moment’s notice for busy weeknights or unexpected guests.
Essential Equipment for Canning Split Pea Soup
Before we dive into the process, let’s talk about what you’ll need for successful canning. You’ll need a pressure canner (this is non-negotiable for soup), canning jars with new lids, basic canning tools like a jar lifter and headspace gauge, and a large pot for cooking your soup. I know the pressure canner might feel intimidating if you’re new to this, but it’s absolutely essential for safely preserving low-acid foods like soup.
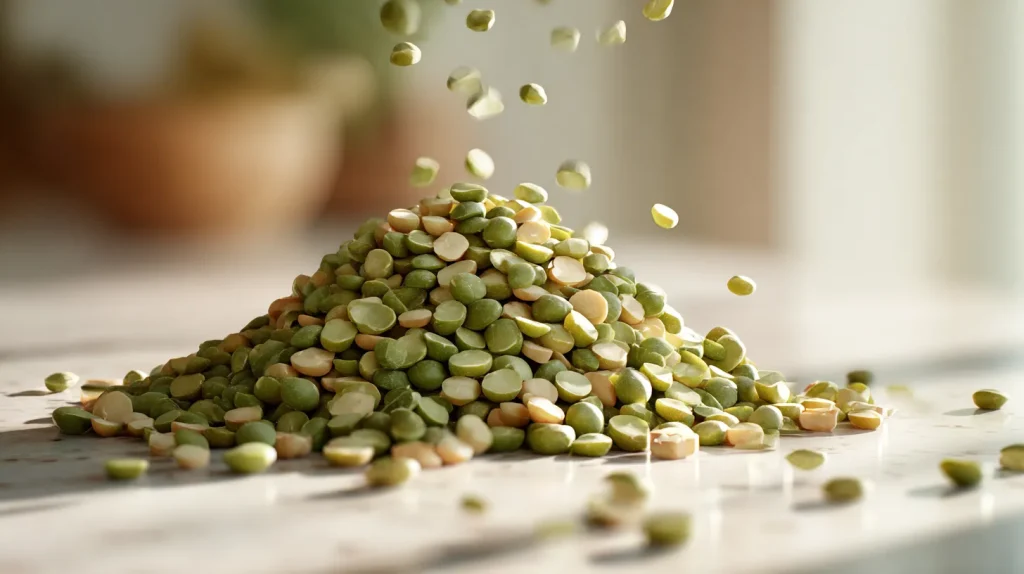
Best Ingredients for Canning Split Pea Soup
The beauty of canning split pea soup lies in its simplicity. You’ll need dried split peas, diced vegetables like carrots, celery, and onions, quality broth or stock, and seasonings. Some recipes include ham or bacon, but for the safest canning practices, I recommend adding any meat after opening and reheating. The vegetables should be fresh and cut into uniform, small pieces that will hold up well during the canning process and create the perfect texture in your finished soup.
Step-by-Step Canning Split Pea Soup Process
Start by cooking your split peas until they’re tender but not completely mushy – they’ll continue cooking during the canning process. In a separate pot, sauté your vegetables until they’re slightly tender but still have some bite to them. Combine your cooked split peas with the vegetables and enough hot broth to create your desired consistency. Remember that the soup will thicken during storage, so err on the side of slightly thinner than you’d normally prefer.
Canning Split Pea Soup Recipe
Learn the safe method for canning split pea soup at home.
Pressure canner with accurate gauge (dial or weighted)
7 quart (32 oz) canning jars or 14 pint (16 oz) jars with new lids and rings
Jar lifter, bubble removal tool, and headspace gauge
Large heavy-bottomed pot for cooking soup
Ladle and wide-mouth funnel
Method
Prepare Jars: Examine all jars for cracks or chips and discard any damaged jars. Wash jars and rings in hot soapy water, rinse thoroughly, and keep jars hot in a 180°F oven or simmering water until ready to fill.
Heat Lids: Place new canning lids in a small saucepan, cover with hot water at 180°F, and keep hot until ready to use. Do not boil lids as this may damage the sealing compound.
Ready Canner: Add 2-3 inches of water to your pressure canner and place the rack inside. Begin heating the canner while preparing the soup to save time during processing.
Cook Split Peas: In a large pot, combine rinsed split peas with 6 cups of water or broth. Bring to a boil, reduce heat to medium, and simmer for 30 minutes until peas are tender but not completely mushy.
Prepare Vegetables: In a separate pot, combine diced carrots, celery, and onions with 2-4 cups of water or broth. Bring to a boil and cook for 5 minutes until vegetables are slightly tender but still firm.
Combine Soup: Add the cooked vegetables and their cooking liquid to the split peas, stirring to combine. Add additional hot water or broth as needed to achieve a soup consistency that covers all ingredients well.
Heat for Processing: Bring the combined soup mixture to a boil and maintain heat throughout the filling process. The soup should be very hot when ladled into jars for safe canning temperatures.
Fill Jars: Using a ladle and wide-mouth funnel, fill hot jars with soup, distributing solids evenly among jars. Leave exactly 1 inch headspace from the rim of each jar, adjusting liquid level as needed.
Remove Air and Seal: Add salt and pepper to each jar if desired, then remove air bubbles by running a plastic tool around the inside of each jar. Wipe jar rims thoroughly with a clean, damp cloth and center hot lids on jars with rings finger-tight only.
Process Under Pressure: Place filled jars on the canner rack using a jar lifter, ensuring jars do not touch each other. Lock canner lid in place, heat until steam vents steadily for 10 minutes, then place pressure regulator on vent and process at 11 pounds pressure for 100 minutes for quarts or 75 minutes for pints. Adjust pressure for altitude: 1,001-2,000 feet use 11 lbs, 2,001-4,000 feet use 12 lbs, 4,001-6,000 feet use 13 lbs, 6,001-8,000 feet use 14 lbs. After processing, turn off heat and let pressure return to zero naturally before opening canner.
Notes
Never use a boiling water bath for split pea soup – pressure canning is mandatory
Do not add meat, dairy products, pasta, or rice as these require different processing methods
Maintain proper headspace and processing times exactly as specified for food safety
Check pressure gauge accuracy annually at your local extension office
Store properly sealed jars in a cool, dark place for up to 2-3 years
Always inspect jars before opening – discard if lid is bulging, leaking, or contents smell off
Bring home-canned soup to a rolling boil for 10 minutes before serving for added safety
Natural separation or thickening during storage is normal for split pea soup
Safety First: Canning Split Pea Soup Requirements
Here’s where we get serious about safety. Canning split pea soup requires pressure canning because it’s a low-acid food. Never attempt to use a water bath canner for soup – it simply won’t reach the temperatures needed to eliminate harmful bacteria. Process your filled jars according to tested guidelines, adjusting pressure for your altitude. This isn’t the place to get creative with timing or pressure – food safety depends on following established procedures exactly.
Proper Storage for Canned Split Pea Soup
Once your jars have cooled and sealed properly, store them in a cool, dark place where they’ll maintain quality for up to two years. Label each jar with the date and any special notes about ingredients or variations you tried. When you’re ready to enjoy your soup, simply heat it gently on the stove, adding a splash of broth if it’s thicker than you prefer.
Troubleshooting Canning Split Pea Soup
Sometimes split peas can break down more than expected, creating a very thick consistency. This is completely normal and safe – just thin it with additional broth when reheating. If any jars don’t seal properly, simply refrigerate them and use within a few days, or freeze for longer storage.
Transform Your Kitchen with Self-Sufficiency
Canning is more than just meal preparation. It’s building food independence and connecting with generational knowledge that our grandmothers treasured. When you learn how to start canning substantial meals like this, you’re creating security for your family while reducing reliance on processed convenience foods.
There’s incredible empowerment in opening your pantry and seeing rows of homemade soup ready to nourish your loved ones. You’re not just saving money or creating convenience. You’re building skills that will serve your family for generations to come. So gather those split peas, fire up that pressure canner, and let’s start building your amazing, self-sufficient kitchen together!
A daily 90-second lesson delivered straight to your inbox, with the exact steps I took to eliminate my dependencies - house, electricity, water, food - and get out in just 5 years (without leaving the suburbs, without acres of land).